
|
Painting your calipers adds a little something to your car. If you have a darker car you usually want something that will contrast. Like a brighter color. If you have a bright color car you can either go with an accent color or go with the same color as the car. I have a white car and I needed a little something to brake up all the white. So I went with a nice intense blue. It took me a wile to find the right color. I knew that I wanted blue but I couldn’t find that right shade. The brake caliper paint that I found was too dark. It was like navy blue even thought it said bright blue. And Dupli-color’s Ford Blue was, well, almost neon blue. I few months later I came across a Dulpi-color that I had never seen before. It was called blue. Just plain old blue. It was just right. But it wasn’t a gross. Something about the 1200 degree paint wont allow it to be glossy. So I picked up a can of clear gloss 500. The first thing that you have to do is remove the wheel (duh). Make sure that you use jack stands and not just a jack. Never trust a jack when you are messing around under the car. I opted to remove the caliper to paint it. Some say that you do not need to do this. I think that you do. There is no way that you are going to be able to get a nice good coverage all the way around the caliper if you leave it on the brake disk and just tape every thing else off. Taking the caliper off also allows you to do a better job of cleaning and prepping the caliper. To remove the caliper on the 99+ cars you need large C-clamp a 12mm socket and 5/8 wrench. I am sure that a 5/8 isn’t exactly the right size but it was the first thing that I grabbed that worked. In the picture that blue arrows point to the bolt that you need to undo and the red arrows point to where you need to hang on with the wrench. The little thing that you have to hang onto with the wrench slips so you need to hang onto it so you can unscrew the bolt. There are 2 bolts holding on each caliper. One on each end. They are not the hard to get loose. Might need a little bit of force but not too much. The first thing you do is compress the pistons. Place the C-clamp to where one side is in one of the arches in front and the other side is on the back. Then tighten gently. Then do the same to the other arch. Then undo the bolts and then you are able to remove the caliper.  Now you need to clean that thing off. I had to use rust remover to clean mine. Brake cleaner wasn’t working at all. I just goopped in on the caliper and let it sit then rinsed it off. I did the underside as well. It took two applications to get it really clean. Look at the difference. The caliper is not bolted on the car. I did remove it to clean it. The car is just holding it for me. 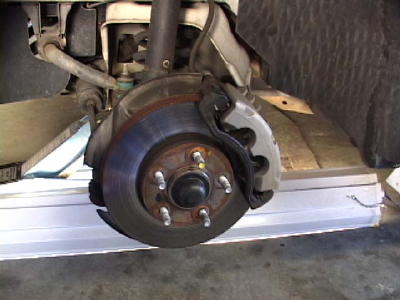  Now you need to tape off the side of the car. I didn’t remove the caliper from the brake line. So I still had to paint in the wheel well. Make sure you do a really good job with the paper and masking tape. I went all the way around the front of the car and all the way to the back of the doors. And then the top and hood of the car too. Nothing was left to chance. Oh and don’t for get to cover the floor a little too. Unless you want a colored floor. As you can see I am using a jack stand to hold up the caliper. With the caliper off the disk I am allowed to get all the way around the side. 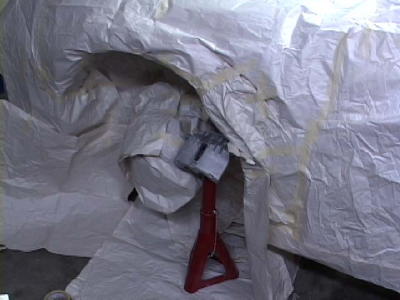 Now you can start to paint. Make sure that you use many light coats rather than a few heavy ones. I don’t really remember how many I used. It was 6 or 7. I then let it sit for about 30 minutes then applied my clear coat. I used 5 coats over a1 hour period then let every thing sit over night before touching it. I also used a heat lamp to help with the curing of the color coats. 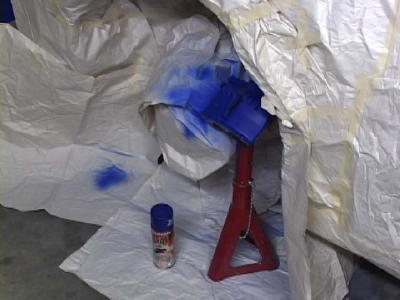 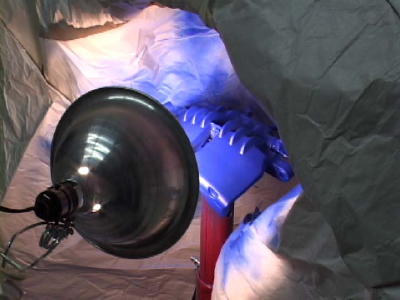 Ok now it’s the next day and I was now able to reinstall the calipers. I just slid them back on and screwed to bolts back in. you might need the wrench and not just the socket. WOW! Nice clean and blue caliper. Put the wheels back on your car and you are almost ready to roll. Before you head out to town you need to turn the car on a pump the brakes a little to re-pressurize the lines. Now you are ready to go.   Now for me it was time to clean up. There was something about this paint. All the particles that were flying around in the air cured really fast and settled on the floor. So I had a really nice layer of blue dust all over the floor and even a little on the car. You can’t really see it in the pictures but trust me it was everywhere. A vacuum with a brush attachment or a damp towel will take care of this really easily.  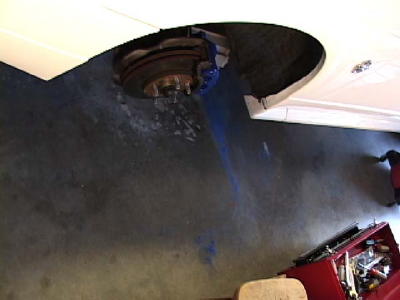 LOOK!! I am finished!  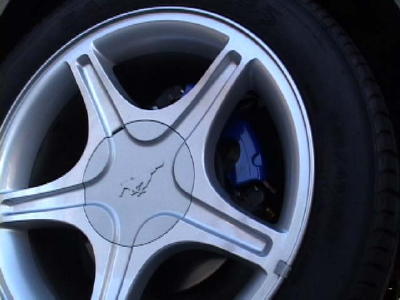 |