This is just how I did it. Others might have done it differently. This
method has worked fine for me. There are other kits out there so this might
not work for the kit that you have. I am not responsible for anything that
happens during or after installation.
I obtained my indiglo gauges off E-Bay. They were $85. You might be able find
them for a lower price. I saw them and just had to have them. They are
Speed Glo two color gauges. It comes with pretty much all the hardware that
you need. I did have to supply two screws of my own to mount the controller.
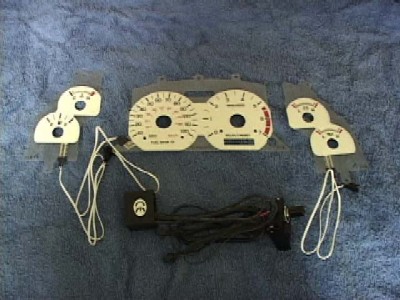
My kit came with all 6 gauges faces, a controller, and all needed wires. The
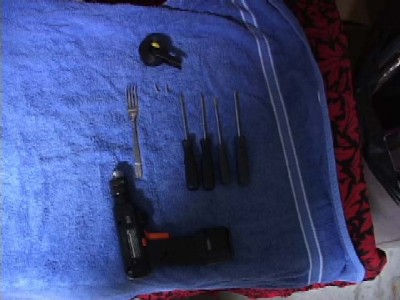
tools that I used were: a fork, a flat head screw driver, a Phillips head
screw driver, two torx/star-tip drivers (a T-15 and a T-20), electrical
tape, two screws, and a drill with a bit that was smaller than the screws
that I chose.
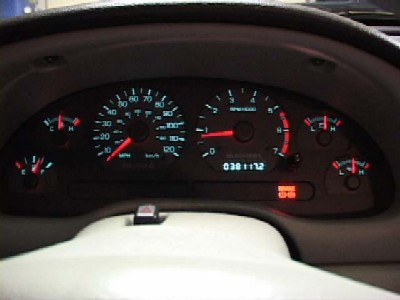
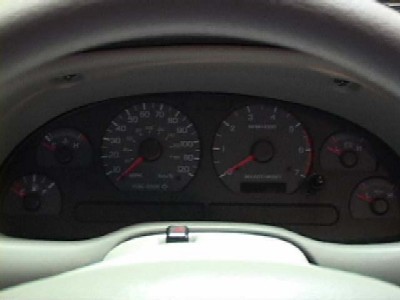
Before you begin to take your car apart you need to start the car and warm
it up. This is so you know where the needles are when the car is warm. You
will need this information when it comes time to reinstall the needles.
Record this information as best as you can. Draw a picture, or as I did, I
took a picture with my digi-cam. You also want to take the car out on the
road and take note what your speedometer is reading at certain RPM’s. Take many
readings in as many gears as you can. Be careful while driving. You will use
this information later too.
The first thing that you are going to have to do is to get the headlamp knob
off. This is easy for some but not for others. What you have to do is pull
out on the knob to where the headlamps come on. Then you will be able to see
a little slot on the shaft part on the knob. Insert the flat head driver in
to the slot. There should be a little tab-like thing in there. You have to
pull toward you. You may have to pull hard. As you are pulling on the tab
you need to pull on the knob. Be careful, it might come off with out
warning. This may take you a wile.
After you get the knob off you can now remove the two screws at the top of
the dash cover. Use to T-20 torx/star-tip driver for this. You can also use
a socket driver/wrench for this. After the two screws are taken out you have
to pull the dash off. It is held in there pretty well so don’t be afraid to
use a little force, but not too much.
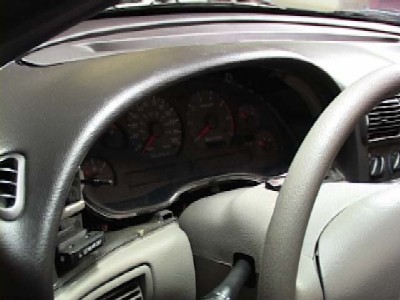
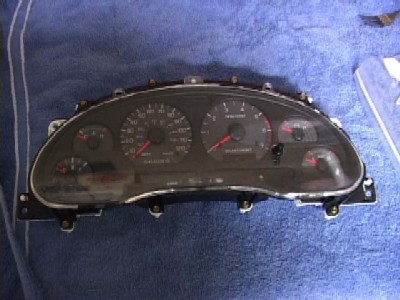
Once you get the dash cover off you need to remove the screws holding the
gauges cluster in. There are 4 screws. They are black. The same kind that
were holding the dash cover in. Use the same driver you used on the dash
cover. Then you will be able to pull the cluster out of the dash. There are
2 plugs in the back of the cluster. Unplug them and then remove the cluster.
Now take your cluster to a place to work on. A large flat area works best.
Now you need to remove the clear cover. The cover is held on be 8 screws.
This is where you use the T-15 torx/star-tip driver. Set the cover aside and
don’t let dust get in it.
Now you have to get the needles off. Some kits don’t require this but mine
did. The instructions said the there should have been a tool for this. There
wasn’t. So I went in to the kitchen and got myself a fork. I place the fork
under the black knob part of the needle and begin to lift up. Be careful not
to hurt the needle. The 4 smaller gauges have needles that have little stops
under then so be very careful not to brake them off. Take you time on this
step.
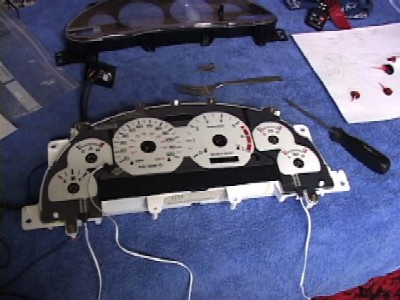
Now you are able to place your new gauges in. just set them right on top of
the factory ones. You might have to use small pieces of electrical tape to
hold them in place.
Now you have to put the needles back on. Reinstall the cluster (with out the
clear cover) making sure to plug the plugs back in to the back. You can just
set it in the dash. You don’t need to screw it back in. You are just going
to take it back out in a few minutes anyway.
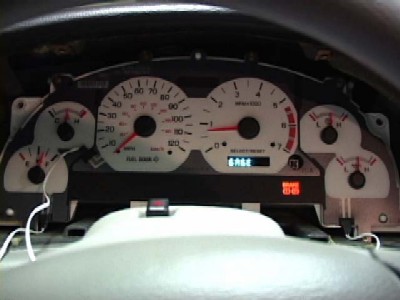
Now restart the car and let it warm back up. You will not know when the car
is warm because the needles are not on the gauges so make sure to give it
plenty of time to warm up. After you are pretty sure the car is now warm you
are able to place the needles back on the gauges using the picture that you
drew or took with a cam. I started with the 4 smaller ones, and then the
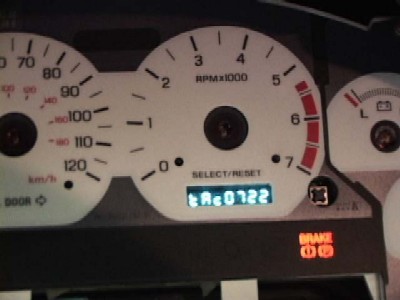
tach and the speedo. To make sure that the tach was as close as I could get
it, I used a trick that I learned at www.mustangworld.com. If you hold in
the trip button and then start the car, you are able to get a digital read
out of the RPM. You hold in the trip and start the car. As soon as it says
“test”, let go. Then push the trip again and again till it says “tAc”. It
turns out that I was off by about 100 RPM. With the help of the digital RMP
gauges I was able to get it damn close. Now, because your speed gauges was
not reading anything when you first warmed up the car to get the information
you needed to reinstall the needles, you have to place the speed needles as
far back as it will go. Now this still might be a little off. So we go for a
test drive. Go out and using the information you gathered at the beginning,
you should be able to tell how far off you are, if any, by your speed
compared to you RPM. I was off by about 3-4 MPH. So I parked the car and
adjusted the speed needle and then went back out on the road and I as dead
on.
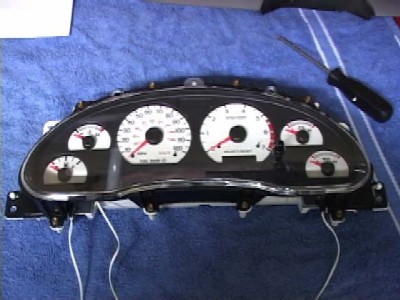
Take the cluster back out of the car and back to your working area. Now you
can put the cover back on the gauges. The wires just hang out of the bottom
of the cluster. I had to use some small pieces of electrical tape to hold
the new faces down so that they wouldn’t move on me.
Now we have to hook up the power. Make sure to disconnect the battery before
working on anything electrical. For this you have to remove the headlamp
switch. I used a 7mm (might have been an 8mm) socket driver for this. Once
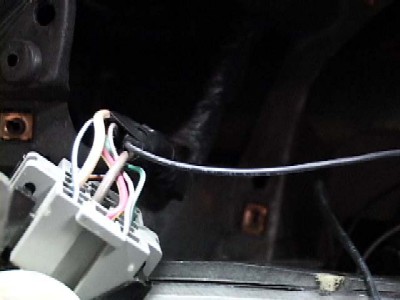
you get it out you see a few wires coming out of it. Find the big brown or
brown-ish/black one. That’s the one you are going to want to splice the
power wire into. Cut some of the factory electrical tape away so that you
have a little more wire to work with. Just cut the wire, far enough away
from the switch so you have a good length of wire to work with, and strip
the insulation away from both ends and then twist the two ends back together
with the indiglo power wire in there. Then use lots of electrical tape to
wrap it all back up. Make sure that you do a good job with the tape. Don’t
want it to come loose. Then tape all the wires back in to the little bundle
they were in before. You can see my power wire (little black wire going to
the right) spliced into that brown wire.
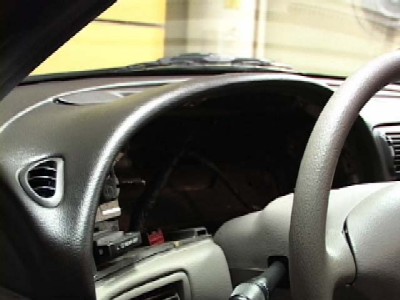
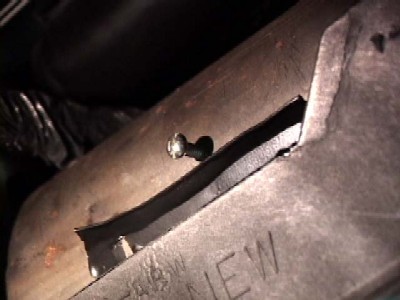
For the ground, well, I couldn’t find a good place to ground the ground wire
so I made my own. I drilled a small hole into that big steel pipe that you
could see when you removed the cluster. Then I found a small screw that fit
into the small hole and secured the ground to the pipe with the screw. Then
I dabbed a little silicon on top and around the screw so that the wire would
stay where I wanted it to.

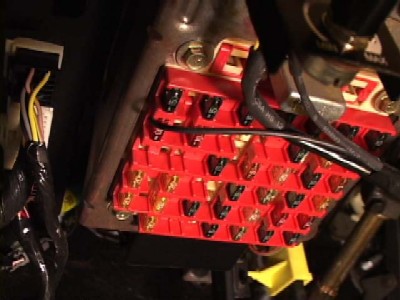
I wasn’t too sure where I wanted the little controller. So I just put it
right in front of the fuse box. It’s out of the way there even though it
might not look like it. I might want to move it later so right there was a
good spot. You wouldn’t be able to see the holes I drilled after I moved it.
Place the controller where you want it. Then mark where the holes are. Use
the drill to make holes for the screws and then screw the controller in.

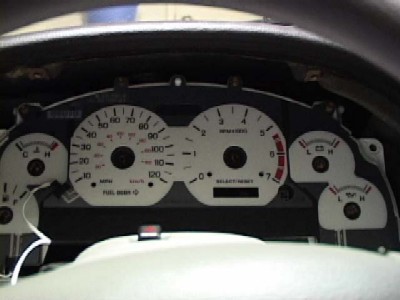
Now you can take your assembled cluster and set it over the steering wheel.
Don’t set it in yet, you still have to plug everything in. Plug the new
gauges in and don’t forget the plugs that are in the back. Now you can set
the cluster back in and screw it in place. Now its time to test. Reconnect
your battery and turn the headlamps on. The gauges should light up. Test to
see that both/all the colors work as well and the dimmer knob. If they don’t
work check to make sure that your power wire it connected. Turn the
headlamps off before you do that.
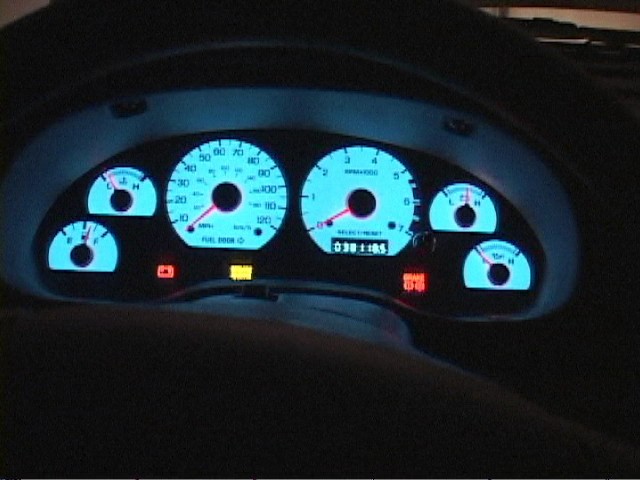
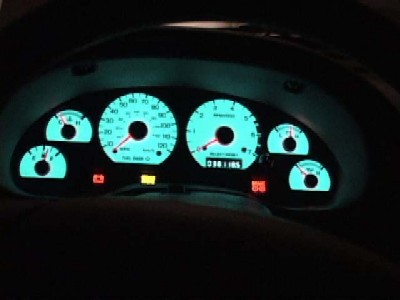
When you get them working you can put the rest of the car back together and
enjoy your new look.
|
